Converting an automatic Nissan 240SX to a manual transmission enhances driving engagement and control‚ offering a more spirited experience for enthusiasts.
This popular modification involves replacing several components‚ demanding careful planning and execution for a successful outcome‚ as noted in various forums.
Understanding ECU compatibility and proper wiring is crucial‚ especially for later model years (97-98) requiring specific or re-pinned ECUs.
Overview of the Conversion
The 240SX automatic to manual swap is a comprehensive process‚ fundamentally altering the drivetrain. It necessitates complete removal of the existing automatic transmission‚ torque converter‚ and associated components like the flexplate.
Subsequently‚ a manual transmission‚ clutch assembly‚ pedal assembly‚ and a compatible ECU must be installed. A critical step involves replacing the automatic pilot bushing with a manual equivalent‚ ensuring proper alignment.
Electrical modifications are significant‚ requiring a bypass of the neutral safety switch to allow starting with the manual transmission. Proper wiring of the new ECU and speed sensor is also essential for functionality. Alignment can be time-consuming‚ potentially taking a week‚ as some enthusiasts have experienced.
Why Swap to Manual?
The primary motivation for a 240SX auto-to-manual swap is an enhanced driving experience. Manual transmissions offer greater driver control‚ allowing for precise gear selection and a more connected feel behind the wheel. This is particularly appealing for enthusiasts seeking a more spirited and engaging drive.
Furthermore‚ a manual swap often unlocks performance potential‚ as manual transmissions generally exhibit fewer parasitic losses compared to automatics. Many prefer the directness and responsiveness of a manual gearbox for track use or spirited driving.
Ultimately‚ the swap caters to those desiring a more traditional and customizable sports car experience‚ moving away from the convenience of automatic operation.
Parts Acquisition
Sourcing the correct components – transmission‚ ECU‚ pedal assembly‚ clutch kit‚ and wiring harness – is vital for a successful 240SX manual swap‚ demanding careful research.
Options include KA24DE‚ SR20DET‚ or RB25DET transmissions‚ each requiring specific ECU considerations for optimal performance and compatibility.
Transmission Options (KA24DE/SR20DET/RB25DET)
Choosing the right transmission is fundamental to your 240SX manual swap. The KA24DE transmission offers a straightforward‚ cost-effective solution‚ often readily available and compatible with existing drivelines.
However‚ the SR20DET transmission‚ known for its robust construction and closer gear ratios‚ provides a significant performance upgrade‚ though requiring more extensive modifications and potentially a different ECU.
The RB25DET transmission represents the highest tier‚ delivering exceptional strength and gearing‚ but demands substantial investment and significant modifications to accommodate its size and power handling capabilities.
Consider your budget‚ power goals‚ and desired driving experience when selecting a transmission‚ as each option presents unique advantages and challenges during installation and operation.
ECU Compatibility and Selection
ECU selection is critical for a successful 240SX manual swap‚ particularly concerning model year compatibility. 1996 models generally require a 1996 ECU‚ while 1997-1998 models necessitate a 1997-1998 ECU.
Alternatively‚ a 1995-1996 ECU can be re-pinned to function within a 1997-1998 chassis‚ offering flexibility but demanding precise wiring modifications.
Incorrect ECU selection can lead to starting issues or improper engine management‚ hindering performance and potentially causing damage.
Carefully verify your vehicle’s year and choose an ECU accordingly‚ or be prepared to undertake the re-pinning process with meticulous attention to detail for optimal results.
Pedal Assembly and Master Cylinder
Transitioning from an automatic to a manual 240SX requires a complete pedal assembly swap‚ including the clutch pedal. Sourcing a complete assembly from a manual transmission-equipped 240SX is highly recommended for a straightforward installation.
Alongside the pedal itself‚ a compatible master cylinder is essential for hydraulic clutch operation. Ensure the master cylinder is in good working condition to guarantee proper clutch engagement.
Proper mounting and alignment of the pedal assembly are crucial for smooth operation and to avoid interference with other components. Careful attention to detail during installation is key.
Verify all connections are secure and the clutch pedal travels freely before proceeding with further steps in the manual swap process.
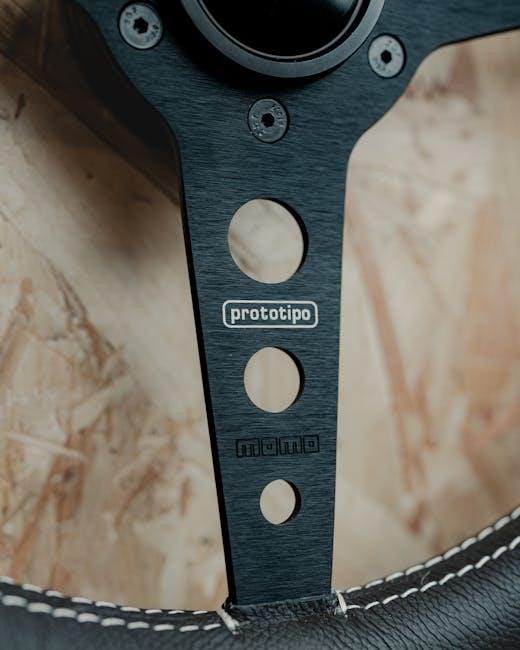
Clutch Kit Selection
Choosing the right clutch kit is vital for a successful 240SX manual swap‚ impacting performance and drivability. Consider your power goals and intended use – stock replacement‚ mild upgrades‚ or high-performance applications.
Clutch kits typically include the pressure plate‚ clutch disc‚ throw-out bearing‚ and pilot bushing. Ensure the kit is specifically designed for the chosen transmission (KA24DE‚ SR20DET‚ or RB25DET).
Pay attention to the clutch disc’s friction material and pressure plate’s clamping force. Upgraded kits offer increased torque capacity‚ beneficial for modified engines.
Research reputable brands and read reviews to ensure quality and reliability. A properly selected clutch kit will provide smooth engagement and long-lasting performance.
Wiring Harness Considerations
Addressing the wiring harness is a critical aspect of the 240SX manual swap‚ requiring careful attention to detail. The automatic transmission wiring needs modification or removal‚ as it’s no longer needed with a manual setup.
Specifically‚ the neutral safety switch wiring must be bypassed or adapted to function with the manual transmission. This often involves looping wires within the relay plug and grounding them‚ as described in enthusiast forums.
ECU wiring will also require adjustments depending on the chosen engine and transmission combination. Ensure compatibility and proper connections for optimal engine management.
Thoroughly review wiring diagrams and consider professional assistance if you’re uncomfortable with electrical work to avoid potential issues.

Removal of Automatic Components
Disassembly begins with draining the automatic transmission fluid‚ then removing the automatic transmission‚ torque converter‚ and flexplate—expect significant fluid spillage.
Subsequently‚ disconnect all associated wiring and remove the shifter cable and linkage‚ preparing the chassis for manual transmission installation.
Automatic Transmission Removal
Initiating the removal process requires safely supporting the engine and disconnecting the driveshaft. Begin by loosening and removing the exhaust system components obstructing access to the transmission. Next‚ disconnect the shift linkage‚ speedometer cable‚ and all electrical connectors attached to the automatic transmission.
Carefully remove the bolts securing the transmission to the engine‚ ensuring the transmission is adequately supported before complete separation. Lower the transmission slowly‚ being mindful of its weight and potential obstructions. Remember to drain the transmission fluid before removal to minimize mess and potential hazards. This step is crucial for a smooth manual swap.
Proper support and careful disconnection are key to avoiding damage during this phase.
Torque Converter and Flexplate Removal
After automatic transmission removal‚ focus on detaching the torque converter from the engine’s flexplate. This requires removing the bolts securing the torque converter to the flexplate‚ often requiring some effort due to potential corrosion. Once loose‚ carefully slide the torque converter backward‚ away from the engine‚ ensuring it clears the transmission mounting surface.

Next‚ remove the flexplate itself. This involves loosening and removing the bolts attaching it to the crankshaft. Be prepared for a significant amount of Automatic Transmission Fluid (ATF) leakage during this process; have drain pans readily available. Replacing the old auto pilot bushing with a new manual one is the next critical step.
Ensure all surfaces are clean before proceeding.
Automatic Transmission Wiring Disconnection
Before fully removing the automatic transmission‚ meticulously disconnect all associated wiring. This includes the wiring harness connected to the transmission itself‚ as well as any sensors or switches linked to its operation. Pay close attention to the neutral safety switch connector‚ as this will require bypassing or modification during the manual swap.
Carefully label each connector to aid in re-wiring or identifying unused wires later. The neutral safety switch‚ crucial for starting the car in Park or Neutral‚ needs a workaround to allow starting with the manual transmission. This typically involves looping wires within the relay plug and grounding them.
Document everything thoroughly!
Shifter Cable and Linkage Removal
Removing the automatic transmission’s shifter cable and linkage is a straightforward‚ yet important step. Begin by disconnecting the cable from the transmission lever. This usually involves a clip or retaining mechanism that needs to be carefully released;
Once detached from the transmission‚ trace the cable back to the interior shifter assembly. Disassemble the center console to access the shifter base and disconnect the cable there. Note the routing of the cable as you remove it; this will be helpful when installing the manual shifter later.
Ensure all components are safely stored‚ as they won’t be reused in the manual swap.

Manual Transmission Installation

Carefully align and mount the manual transmission to the engine‚ ensuring proper engagement with the pilot bushing. This step can be time-consuming‚ requiring patience.
Securely fasten the transmission with appropriate bolts‚ and then connect the driveshaft‚ verifying proper alignment for smooth operation.
Pilot Bushing Installation
Before installing the manual transmission‚ replacing the automatic transmission’s pilot bushing is essential for proper alignment and smooth clutch operation. This seemingly small component plays a critical role in centering the transmission input shaft within the crankshaft.
Removing the old bushing can be challenging‚ often requiring a specialized pilot bushing removal tool; some users reported breaking bushings during removal‚ highlighting the need for caution.
Once removed‚ thoroughly clean the bore and then carefully install the new manual transmission pilot bushing‚ ensuring it’s seated correctly and flush with the surrounding surface. Proper installation prevents premature wear and ensures optimal transmission function. A correctly installed bushing is vital for a successful swap.
Manual Transmission Mounting
Carefully lifting the manual transmission into position requires patience and potentially assistance‚ as aligning it with the engine can be time-consuming. One Reddit user noted it took almost a week‚ even during spring break‚ to properly align the transmission.
Ensure the input shaft is correctly aligned with the pilot bushing before attempting to mate the transmission to the engine. Gentle persuasion and slight adjustments may be necessary to overcome any resistance.
Once aligned‚ slowly and steadily push the transmission into place‚ verifying it seats fully against the engine. Secure it with the appropriate bolts‚ tightening them to the manufacturer’s specified torque to prevent loosening or damage.
Clutch Installation
Before installing the manual transmission‚ the clutch disc must be centered using a clutch alignment tool. This ensures smooth engagement and prevents difficulty mating the transmission to the engine. Proper centering is vital for a hassle-free installation process.
Carefully slide the clutch disc onto the flywheel‚ ensuring it’s oriented correctly. Then‚ install the pressure plate‚ aligning it with the dowel pins on the flywheel. Secure the pressure plate with the provided bolts‚ tightening them in a star pattern.
Double-check that the clutch assembly is securely fastened before proceeding with the transmission installation‚ as a loose clutch can cause significant issues.
Driveshaft Connection
After the manual transmission is mounted‚ connect the driveshaft. Ensure the driveshaft is properly aligned with the transmission output shaft and the rear differential flange. A misaligned driveshaft can cause vibrations and premature wear on the U-joints and differential.
Install the driveshaft flange and secure it with the appropriate bolts‚ tightening them to the manufacturer’s specified torque. Verify that the driveshaft spins freely without binding or excessive play. Inspect the U-joints for any signs of damage or wear.
Proper driveshaft connection is crucial for transferring power efficiently and maintaining a smooth driving experience.

Electrical Modifications
Essential electrical work includes bypassing the neutral safety switch‚ installing the correct ECU‚ and connecting the speed sensor for accurate vehicle operation.
Looping wires within the relay plug and grounding them enables starting with the manual transmission‚ as detailed in enthusiast forums.
Careful wiring ensures seamless integration and proper functionality of the new manual system.
Neutral Safety Switch Bypass
The neutral safety switch prevents the engine from starting unless the transmission is in Park or Neutral. With a manual swap‚ this system needs to be bypassed because the switch no longer functions as intended with the absence of an automatic transmission.
Fortunately‚ a straightforward solution involves locating the relay plug associated with the neutral safety switch. As described in online forums like TriStateTuners‚ you’ll need to take a wire and loop it between specific terminals within the plug.
This effectively “tricks” the car into thinking it’s in Park or Neutral‚ allowing the engine to start. Crucially‚ this looped wire must then be grounded to complete the bypass. Incorrect wiring could lead to starting issues or other electrical problems‚ so double-check your connections!
Proper grounding is vital for a safe and functional bypass.
ECU Installation and Wiring
Selecting the correct ECU is paramount for a successful 240SX manual swap‚ with compatibility heavily dependent on the vehicle’s year. Nissan forums highlight that 1996 ECUs are generally interchangeable‚ but 1997-1998 models require either a matching ECU or a re-pinned 1995-1996 unit.
Once the appropriate ECU is secured‚ careful wiring is essential. Beyond the neutral safety switch bypass‚ ensure all necessary connections are made for the new transmission and related sensors.
Pay close attention to any modifications needed for the speed sensor‚ as the automatic and manual setups differ. Thoroughly review wiring diagrams and double-check all connections before powering up the system to avoid potential issues;
Proper ECU installation and wiring are critical for engine operation.
Speed Sensor Connection
The speed sensor connection differs significantly between automatic and manual 240SX transmissions‚ requiring careful attention during a swap. Automatic setups utilize the transmission to generate a speed signal‚ while manual transmissions rely on a sensor typically located on the transmission output or differential.
Ensuring proper connection is vital for accurate speedometer readings and correct operation of other vehicle systems‚ like cruise control.
Wiring may involve running a new signal wire from the manual transmission’s speed sensor to the ECU and instrument cluster.
Verify compatibility and consult wiring diagrams to ensure the correct pins are used for a functional speed signal.

Final Steps and Adjustments
After installation‚ meticulously adjust the shifter for precise engagement and bleed the hydraulic clutch line to ensure optimal pedal feel and function.
ECU programming might be necessary to fine-tune performance and eliminate any error codes related to the transmission swap.
Shifter Installation and Adjustment
Once the manual transmission is securely mounted‚ installing the shifter assembly is the next critical step. Ensure proper alignment with the transmission’s shift linkage for smooth and accurate gear changes. Many aftermarket shifters offer adjustable settings‚ allowing you to customize the throw and feel to your preference.
Carefully review the shifter’s instructions‚ as installation procedures vary between models. Precise adjustment is vital; incorrect positioning can lead to difficulty selecting gears or even damage to the transmission. Take your time and test each gear thoroughly after initial adjustments. Fine-tuning may require iterative adjustments until optimal performance is achieved‚ ensuring a satisfying driving experience.
Remember to double-check all bolts and fasteners for tightness after completing the adjustment process.
Hydraulic Clutch Line Bleeding
After installing the hydraulic clutch line‚ thoroughly bleeding the system is paramount to ensure proper clutch engagement. Air trapped within the lines will result in a spongy pedal feel and difficulty shifting. Begin by locating the bleeder screw on the slave cylinder.
Utilize a bleeding kit or the traditional two-person method – one to pump the clutch pedal and another to open and close the bleeder screw. Continuously pump the pedal while monitoring the fluid level in the reservoir‚ adding fluid as needed. Repeat this process until clear‚ bubble-free fluid emerges.
A firm pedal feel indicates successful bleeding‚ guaranteeing optimal clutch performance and preventing premature wear.
ECU Programming (if necessary)
Depending on the chosen transmission and ECU‚ programming may be required for optimal performance and to eliminate potential issues. Some ECUs automatically adapt‚ while others necessitate adjustments to vehicle speed sensor (VSS) readings or other parameters.
Consult with a tuning specialist to determine if your specific setup requires reprogramming. Incorrect settings can lead to inaccurate speedometer readings‚ erratic engine behavior‚ or even prevent the engine from starting.
Proper ECU tuning ensures seamless integration of the manual transmission‚ maximizing power delivery and drivability‚ ultimately enhancing the overall driving experience of your 240SX.

Potential Issues and Troubleshooting
Common challenges include ECU compatibility problems‚ clutch engagement difficulties‚ and transmission alignment issues during the swap process‚ requiring patience and careful diagnosis.
Incorrect wiring or a faulty neutral safety switch bypass can prevent starting‚ while mismatched components may cause operational inconsistencies.
ECU Compatibility Problems
Ensuring proper ECU compatibility is paramount during a 240SX manual swap‚ as automatic and manual transmission ECUs differ significantly. For 1996 models‚ the replacement ECU must be from a 1996 vehicle‚ or potentially a 1995 unit. However‚ 1997-1998 240SX models present a unique challenge.
These later models require an ECU specifically from a 1997-1998 240SX. Alternatively‚ a 1995-1996 ECU can be utilized‚ but it necessitates a complete repinning process to function correctly within the 1997-1998 system. Incorrect ECU selection will lead to starting issues‚ poor engine performance‚ and potentially damage to other components. Thorough research and verification are crucial before finalizing the ECU choice.
Failure to address this can result in a non-functional vehicle.
Clutch Engagement Issues
Experiencing difficulties with clutch engagement post-swap is a common issue; This can manifest as a spongy pedal feel‚ difficulty shifting into gear‚ or the clutch slipping under load. Proper bleeding of the hydraulic clutch line is absolutely critical to eliminate air bubbles‚ which are a frequent cause of these problems.
Incorrect clutch kit selection‚ or improper installation‚ can also contribute to engagement issues. Ensure the clutch disc is oriented correctly and the pressure plate is securely fastened. Furthermore‚ verifying proper pilot bushing installation is essential for smooth operation.
Troubleshooting may involve re-bleeding the system multiple times or inspecting the clutch components for damage.
Transmission Alignment Difficulties
Aligning the manual transmission to the engine can be a frustrating part of the swap process‚ often taking considerable time and patience. The transmission input shaft must perfectly align with the pilot bushing in the crankshaft. Failure to achieve this alignment will prevent the transmission from seating fully‚ making bolt installation impossible.
Gentle persuasion with a pry bar or careful maneuvering may be necessary‚ but forcing the transmission can damage components. Ensuring the engine and transmission mounts are properly positioned and in good condition is vital.
Some enthusiasts report spending nearly a week wrestling with alignment‚ highlighting the importance of careful preparation and assistance.

Cost Breakdown
Estimating the total cost of a 240SX manual swap varies significantly based on parts choices and labor. A basic swap‚ utilizing used components‚ can range from $800 to $1500‚ encompassing the transmission‚ clutch kit‚ pedal assembly‚ and ECU.
However‚ opting for a new transmission (SR20DET or RB25DET) and a performance clutch kit can easily push the cost beyond $2500. Wiring harness modifications or professional installation add further expenses‚ potentially exceeding $500-$1000.
Unexpected costs‚ such as replacing worn bushings or addressing unforeseen issues‚ should also be factored into the budget. Thorough research and careful planning are crucial for managing expenses effectively.